
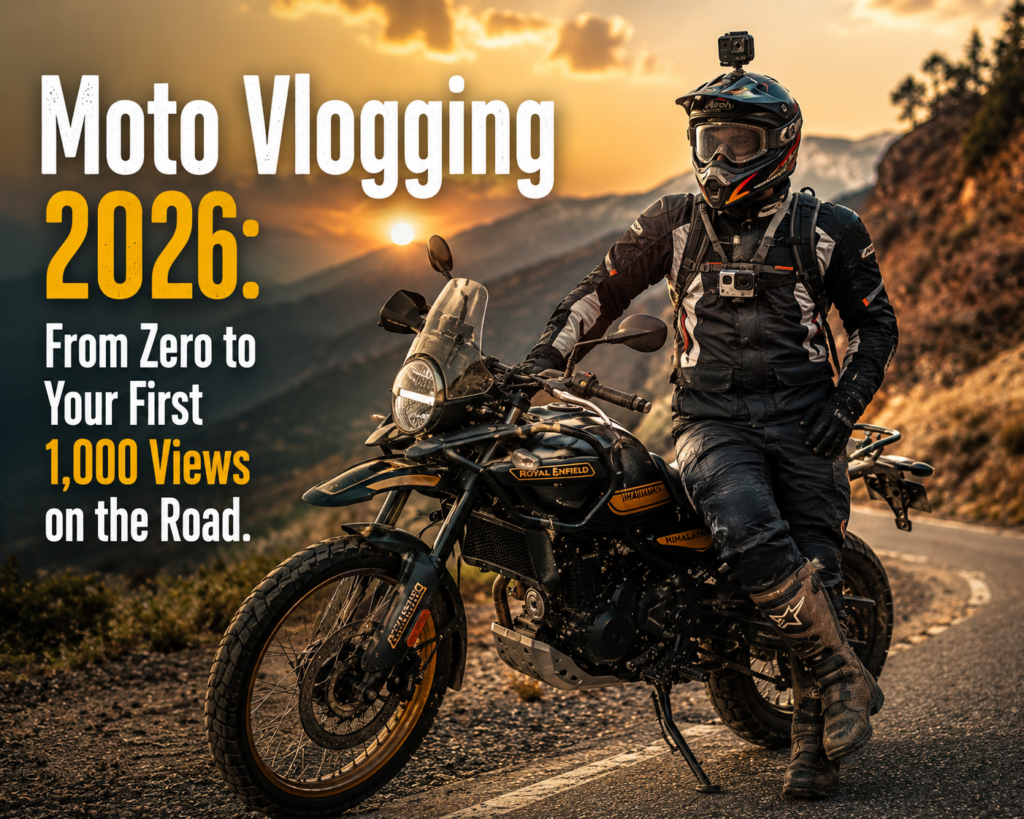
Day 1. Somewhere on NH-48, 6:47am.
The alarm went off at 5am. I’d packed the night before — SD cards formatted, power banks charged, GoPro mounted on the chin of the helmet, chest mount clipped onto the jacket, Sena 50R paired to the phone. The route was downloaded offline on Google Maps. The fuel tank was full.
I stepped out into the pre-dawn quiet, swung a leg over the bike, and hit record.
That first hour — the empty highway before the trucks woke up, the mist on the fields, the slow orange arrival of sunrise through my visor, the sound of the engine and the wind captured clearly through the Sena’s microphone — that footage became the opening of the video that got my channel its first 500 subscribers.
The setup wasn’t expensive. The bike wasn’t new. The editing wasn’t perfect.
But the ride was real. And real, on a motorcycle, is enough.
This guide is everything I wish I had before that first ride — the gear, the mounts, the audio setup, the camera comparisons, the safety gear that kept me alive to tell you about it.
Let’s set you up.
Quick Reference: Moto Vlog Setup by Budget
| Budget | Camera | Mic/Audio | Helmet Mount | Intercom | Total Setup Cost |
|---|---|---|---|---|---|
| Beginner (₹15,000–25,000) | GoPro Hero 12 (used) / Insta360 GO 3S | Sena SMH5 built-in mic | Curved adhesive mount | Sena SMH5 (single) | ₹18,000–28,000 |
| Mid-Range (₹40,000–70,000) | GoPro Hero 13 Black / DJI Osmo Action 6 | Sena 50R / Cardo Packtalk Edgr | Chin mount + chest mount | Sena 50R | ₹45,000–75,000 |
| Advanced (₹80,000–1,50,000) | DJI Osmo Action 6 + Insta360 X4 (dual cam) | Sena 50S / Cardo Packtalk Bold | Chin + chest + handlebar | Sena 50S mesh group | ₹90,000–1,60,000 |
| Pro Creator (₹1,50,000–3,00,000+) | DJI Osmo Action 6 + DJI Osmo Pocket 4 + Insta360 X5 | Sena 50S + external lavalier | Full multi-mount system | Cardo Packtalk Bold JBL | ₹1,60,000–3,20,000+ |
Cameras for Moto Vlogging — The Complete 2026 Comparison
Why Action Cameras Are the Right Choice for Moto Vlogging
Action cameras are specifically designed to be compact, durable, and highly stable. They offer advanced image stabilisation, making handheld shooting smooth and professional-looking. More importantly, they are built to withstand tough conditions — including rain, dust, accidental drops — which makes them ideal for travel, adventure, and day-in-the-life vlogging.
For moto vlogging specifically: the bike vibrates, the wind shakes mounts, the weather changes without warning, and you need a camera that survives all of this while recording at 60fps so fast-moving road footage is smooth. A DSLR or mirrorless camera on a helmet is not the right tool. An action camera is.
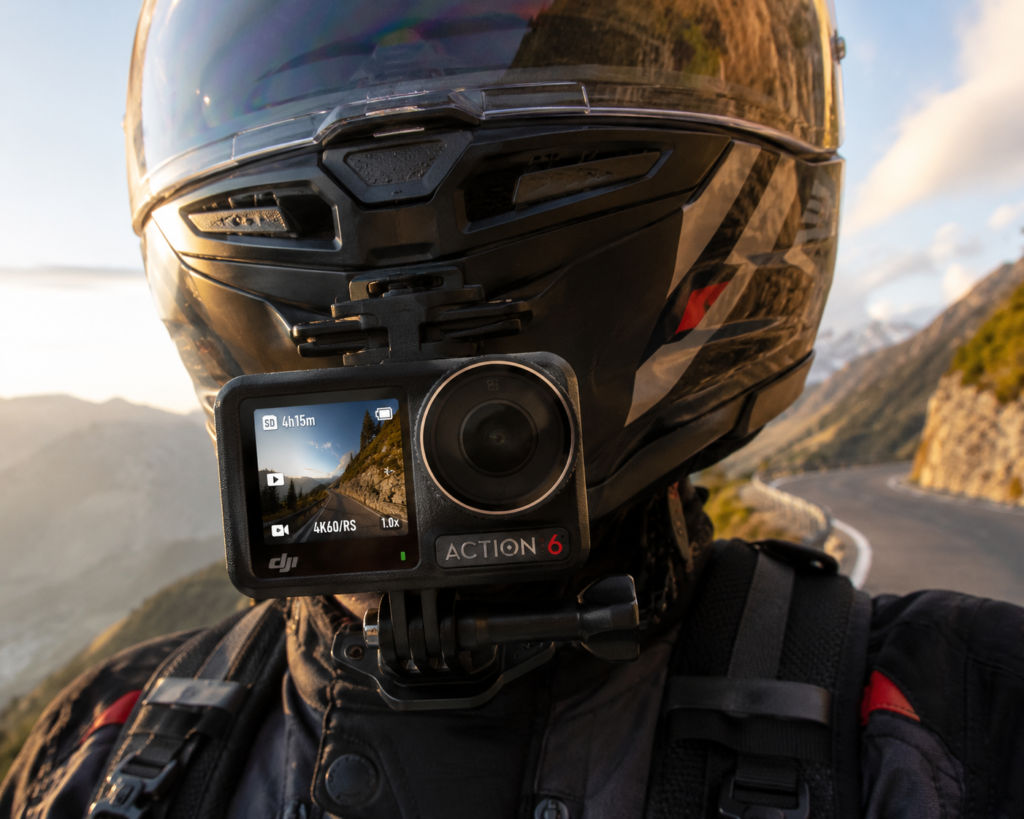
Camera 1: DJI Osmo Action 6 — The 2026 Champion
Price (India 2026): ₹32,000–38,000
The DJI Osmo Action 6 features a large 1/1.1-inch sensor and a lens sporting an f/2.8-f/4.0 variable aperture — a first for action cameras. Its low-light performance is absolutely class-leading among action cameras. With 20m of native waterproofing and a full ecosystem of mounts and accessories, the Osmo Action 6 can be used to record extreme watersports, bike rides and more.
The 4K footage is available at up to 120fps and looks brilliant in a range of situations. The DJI Osmo Action 6 is undoubtedly the best action camera for vlogging right now.
Pros for Moto Vlogging:
- Best low-light performance of any action camera — critical for dawn starts and tunnel riding
- Variable aperture handles changing light on long rides
- RockSteady 4.0 electronic stabilisation — the smoothest stabilisation available
- Dual front-and-back screens for easy framing at helmet or chest position
- 4K/120fps for slow-motion road footage
Cons:
- More expensive than GoPro Hero 13
- DJI ecosystem lock-in for accessories
- Current tariff situations do mean that you can’t get hold of the Osmo Action 6 very easily in the US at the moment — but India availability through Amazon and DJI India is good
Best for: Riders who want the best possible image quality, especially for dawn/dusk riding and content that needs to look cinematic
Camera 2: GoPro Hero 13 Black — The Reliable Workhorse
Price (India 2026): ₹35,000–42,000 (standard) | ₹45,000–55,000 (Creator Edition)
The GoPro HERO13 Black is a refined upgrade over the previous generation, introducing a larger 1,900mAh Enduro battery and support for the new HB-Series Lens Mods. It records detailed 5.3K video at up to 60fps, giving creators more flexibility for cropping and editing than standard 4K.
The GoPro HERO 13 Black is the best vlogging action camera for people who film in harsh and unpredictable environments. It features a rugged body that is waterproof up to 33 feet without a case and includes a replaceable hydrophobic lens cover that repels water for clearer shots. The camera supports magnetic mounting for fast setup changes.
Pros for Moto Vlogging:
- HyperSmooth 6.0 — class-leading stabilisation especially at HyperView wide angle
- 5.3K recording gives you crop flexibility for YouTube + Instagram Reels from one recording
- Magnetic mounting system (Quik Clip) fastest setup/removal on the market
- Best ecosystem of mounts and accessories of any action camera
- Enduro battery rated to better cold performance — useful for Himalayan rides
Cons:
- More expensive than the DJI Osmo Action 6 for comparable video quality
- Low-light performance behind the Osmo Action 6’s larger sensor
- MediaMod needed for good external mic connection — adds ₹7,000–9,000 to setup cost
Best for: Riders who want the most accessories and mount options, those who need the magnetic quick-release system, and those in the GoPro ecosystem already
Camera 3: Insta360 X4 — The Freedom Camera for Moto Vlogging
Price (India 2026): ₹40,000–50,000
The Insta360 X4 is a 360 camera built for creators who want more freedom while filming. Instead of aiming perfectly, you can record everything and choose the best angles later.
Why this changes moto vlogging: Mounted on a helmet top or selfie stick from the handlebar, the Insta360 X4 captures everything — front of bike, rider, road, and sky simultaneously. You choose the angle in editing. This means one camera does the job of three.
Pros:
- One camera, infinite angles — choose in post editing
- The “invisible selfie stick” effect: mount on bike, the stick disappears in 360 footage
- 8K 360 recording — extraordinary detail for large-format editing crops
- Perfect for scenic route footage where you don’t know what angle will look best
Cons:
- 360 editing requires more time and skill than standard action camera editing
- Insta360 Studio software has a learning curve
- Not ideal as a primary camera for talking-head commentary style vlogs
Best for: Adventure riders on scenic routes, those who want to capture panoramic landscapes, content creators who enjoy creative post-editing freedom
Camera 4: DJI Osmo Pocket 4 — The Conversational Camera
Price (India 2026): ₹38,000–48,000
The DJI Osmo Pocket 4 combines intelligent shooting tools, advanced colour modes, and fast, reliable focusing to deliver polished results with minimal setup. Supported by a motorised 3-axis rotating gimbal for super-smooth stable footage even when walking or moving.
Best use in moto vlogging: Not for helmet mounting — this is your talking-to-camera device. Mount it on a handlebar clamp or tank mount when stopped to deliver your commentary. The stabilisation makes even stop-and-start filming look professional.
Pros:
- Best audio of any compact camera (built-in 3-microphone array)
- Gimbal stabilisation at a level no electronic stabilisation can match
- Portrait mode — perfect for Instagram Reels vertical framing
- Flip screen for self-monitoring
Cons:
- Not waterproof (needs a case in rain)
- Fixed 20mm equivalent lens (no zoom)
- Not suitable for helmet mounting while riding
Camera 5: Budget Entry — Insta360 GO 3S
Price (India 2026): ₹18,000–22,000
The smallest, lightest action camera in serious use. Magnetic clip mount goes on helmet, jacket collar, or chest — completely hands-free and barely noticeable.
Best for: Beginners who want to start shooting without a large investment. Excellent for casual content, Instagram Reels, and YouTube Shorts. Image quality is behind the GoPro/DJI options but the convenience factor is unmatched.
The Complete Camera Comparison Table
| Camera | Price (India) | Best For | Stabilisation | Low Light | Waterproof | Mic Input |
|---|---|---|---|---|---|---|
| DJI Osmo Action 6 | ₹32,000–38,000 | Best overall 2026 | RockSteady 4.0 | ⭐⭐⭐⭐⭐ | 20m native | Yes |
| GoPro Hero 13 Black | ₹35,000–42,000 | Most mounts/accessories | HyperSmooth 6.0 | ⭐⭐⭐⭐ | 10m native | Via MediaMod |
| Insta360 X4 | ₹40,000–50,000 | 360° freedom shots | FlowState | ⭐⭐⭐ | 10m native | Yes |
| DJI Osmo Pocket 4 | ₹38,000–48,000 | Commentary/talking | 3-axis gimbal | ⭐⭐⭐⭐⭐ | No (case needed) | Built-in 3-mic |
| Insta360 GO 3S | ₹18,000–22,000 | Beginner/lightweight | FlowState | ⭐⭐⭐ | 5m native | No |
Helmet Camera Mounting — Every Setup Explained
Understanding Helmet Mount Positions
The mount position determines your shot composition, vibration level, and wind drag. Each position has specific use cases.
Mount Position 1: Chin Bar Mount (Most Popular for Moto Vlogging)
What it captures: Low, forward-facing POV — shows the road, the bike’s instrument cluster, and the scenery at a natural eye-level. Most cinematic position for moto vlogs.
How to install:
- Clean chin bar surface with alcohol wipe — must be completely grease-free
- Apply the curved adhesive mount (comes with GoPro/DJI) firmly — hold 60 seconds
- Allow 24 hours before riding for full adhesive cure
- Attach camera with the mount arm extended forward for best angle
Best cameras for chin mount: DJI Osmo Action 6, GoPro Hero 13 (the wider lens makes chin mount more forgiving on angle)
Pros: Natural POV, lower wind drag than top mount, excellent road footage Cons: More vibration transmitted through chin bar, camera more exposed in a crash
Price for adhesive curved mount: ₹500–1,500 (included with most cameras or sold separately)
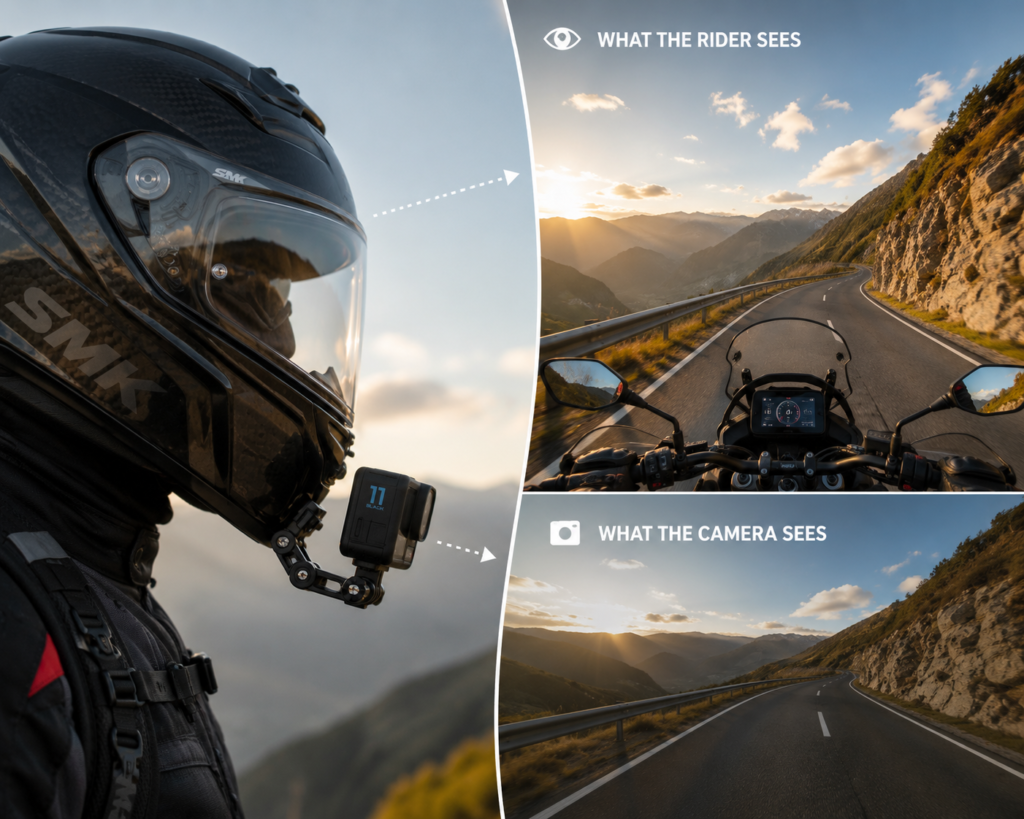
Mount Position 2: Helmet Top Mount
What it captures: High, wide POV — shows the road, horizon, and both sides of the road. More landscape-oriented.
How to install:
- Clean the flat top of the helmet thoroughly
- Use flat adhesive mount for flat surfaces, curved mount for rounded helmets
- Some riders use Velcro for a non-permanent option — attach Velcro hook-side to helmet, loop-side to the mount
Best cameras for top mount: Insta360 X4 (the selfie stick extends down and the stick becomes invisible in 360 footage), GoPro Max2
Pros: Better wide views, less vibration than chin, good for landscape routes Cons: More wind drag, can affect aerodynamics and helmet stability at speed above 100kmph
Mount Position 3: Side Mount
What it captures: Profile view of the rider from the side — shows helmet, arm, road, and surroundings. Rarely used as primary camera but good as secondary angle.
How to install: Adhesive mount on the side of the helmet — left side preferred (away from traffic in left-hand-drive countries like India)
Mount Position 4: Chest Mount (Highly Recommended as Secondary Camera)
What it captures: Looking down at the tank, instruments, hands on bars — with the road below. Immersive POV that shows body language.
How to install: GoPro Chesty or DJI chest harness — straps over the jacket. Position the camera just below the sternum, tilted down 15 degrees.
Best cameras for chest mount: GoPro Hero 13 (HyperView lens gives immersive wide angle), DJI Osmo Action 6
Pros: Shows more of the riding experience, stable mount, easy to adjust angle Cons: Visibility blocked when looking down, not ideal for talking-to-camera
Price for chest mount harness: ₹1,200–3,500

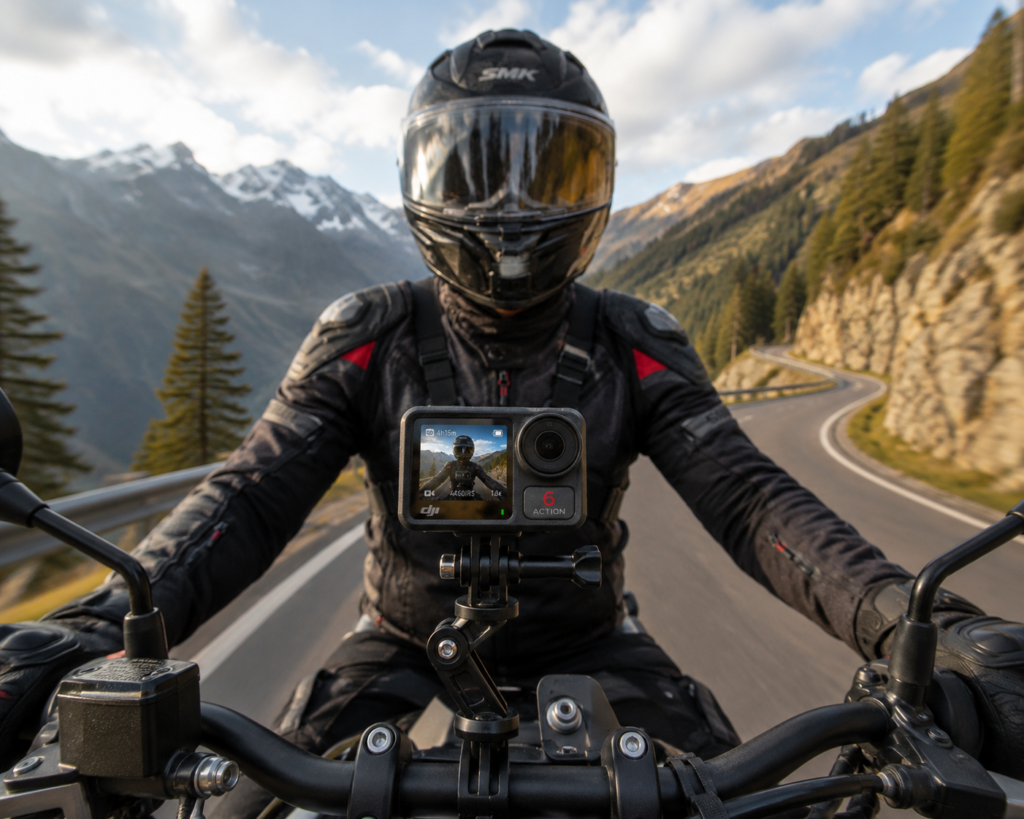
Mount Position 5: Handlebar / Stem Mount
What it captures: Third-person-ish view showing the rider on the bike from the front — dramatic and cinematic.
How to install: Handlebar clamp mount (₹500–1,500) clamps to handlebar or stem. Extend arm forward with camera facing back at rider.
Best for: Scenic shots, talking-to-camera at stops, low-speed maneuvers
The Recommended Multi-Camera Setup (3-Camera Moto Vlog)
Camera 1 (Primary POV): DJI Osmo Action 6 — chin mount, 4K/60fps Camera 2 (Chest/Atmosphere): GoPro Hero 13 — chest mount, 4K/60fps, HyperView Camera 3 (360°/Scenes): Insta360 X4 — top mount or selfie stick extension, 8K 360
This three-camera setup gives you: road footage, rider footage, and landscape/scene footage — everything needed for a complete moto vlog.
Total 3-camera setup cost: ₹1,05,000–1,30,000
Audio for Moto Vlogging — The Most Underrated Element
Why Audio Makes or Breaks a Moto Vlog
Bad audio kills a good video. The engine, wind noise, and road vibration at 80kmph create a wall of sound that destroys built-in camera microphones. The solution: a Bluetooth intercom system or helmet-mounted microphone that captures your voice from inside the helmet, away from the wind.
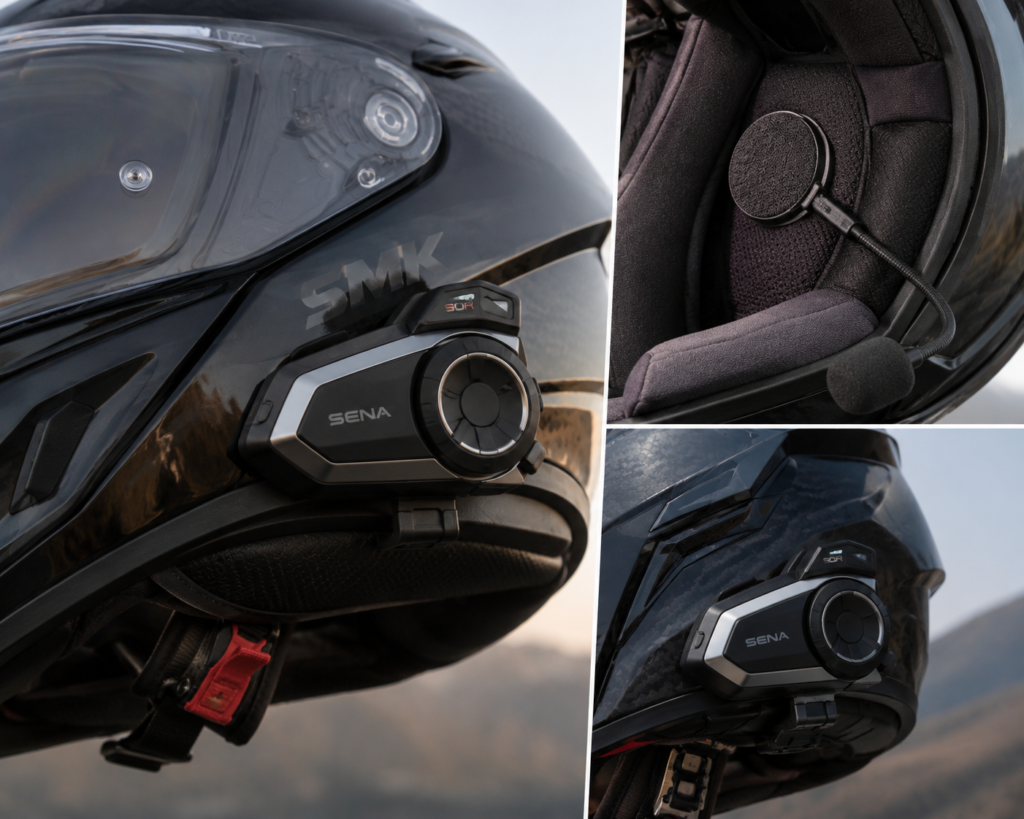
Option 1: Sena Intercoms — The Gold Standard
Sena 50R (Best for Solo + Group Moto Vloggers) Price (India 2026): ₹20,000–25,000
The Sena 50R is the most popular moto vlog intercom in 2026. It connects to your camera via a hardwired or Bluetooth audio connection, pairs to your phone for music and navigation audio, and allows group communication with up to 24 riders via Mesh intercom.
Key features:
- Dual Bluetooth chips — one for camera, one for phone simultaneously
- Mesh Intercom 2.0: connects up to 24 riders, auto-reconnects when riders leave/rejoin range
- Natural Voice Control: “Hey Sena” command activation — no button pressing while riding
- Audio Multitasking: you can hear GPS navigation and talk to group riders simultaneously
- Battery: 13 hours intercom + 7 days standby
For solo vloggers: Connect Sena 50R to your GoPro/DJI via the 3.5mm audio cable — your voice is captured clearly inside the helmet, wind noise dramatically reduced.
For groups: Mesh connects all helmets — group conversation recorded as your commentary alongside road footage. Extraordinary content when riding with friends.
Pros: Best audio quality, best range, most features, huge community support Cons: Premium price, setup can take 30 minutes initially, charging port exposed
Sena 50S (Best for Premium Group Touring) Price (India 2026): ₹28,000–35,000
The flagship Sena — adds harman/kardon premium speakers (the difference in music quality on long rides is significant), a larger battery (14 hours), and better noise cancellation.
Best for: Riders who use their intercom for music 50% of the time and communication 50% — the audio quality for both is the best available.
Sena SMH5 (Best Budget Entry) Price (India 2026): ₹7,000–9,000
Single pairing, no Mesh intercom, basic Bluetooth. Good for beginners who want to test the setup before investing in premium.
Cons: Only pairs to one device, no Mesh group intercom, audio quality noticeably below the 50R
Option 2: Cardo Packtalk Intercoms — The Sena Rival
Cardo Packtalk Edgr Price (India 2026): ₹17,000–22,000
Cardo’s competitor to the Sena 50R. The Cardo uses Dynamic Mesh Communication (DMC) — a proprietary mesh protocol that some riders consider more stable than Sena’s Mesh for very large groups.
Comparison vs Sena 50R:
| Feature | Sena 50R | Cardo Packtalk Edgr |
|---|---|---|
| Mesh Intercom | Yes (24 riders) | Yes (15 riders DMC) |
| Bluetooth version | 5.2 | 5.2 |
| Battery life | 13 hours | 13 hours |
| Natural voice | Yes (“Hey Sena”) | Yes (“Hey Cardo”) |
| Speaker quality | Good | Good |
| Audio to camera | 3.5mm cable + Bluetooth | 3.5mm cable |
| Price India | ₹20,000–25,000 | ₹17,000–22,000 |
Verdict: Sena 50R wins on ecosystem and camera connectivity. Cardo Packtalk Edgr wins on price and is slightly better for very large group mesh (10+ riders).
Cardo Packtalk Bold JBL (Premium) Price (India 2026): ₹30,000–38,000
JBL speakers in an intercom unit. The audio quality for music is genuinely excellent — the best in the intercom category. If music on long rides is important to you, this is the product.
Option 3: Budget Bluetooth Intercoms (Under ₹3,000)
For those starting out, several budget intercoms under ₹3,000 exist on Amazon India (LEXIN, Freedconn, LS2 OEM).
Honest assessment: These work. They are not as reliable, not as loud, not as noise-cancelling, and not as feature-rich as Sena or Cardo. For group communication up to 2–3 riders at short range (200–300m), they are adequate. For serious moto vlogging with audio captured for YouTube, upgrade to Sena SMH5 minimum.
Budget intercom comparison:
| Product | Price | Range | Riders | Audio Quality |
|---|---|---|---|---|
| LEXIN FT4 | ₹2,500–3,500 | 500m | 4 | Basic |
| Freedconn T-COMVB | ₹2,000–2,800 | 300m | 2 | Basic |
| Sena SMH5 | ₹7,000–9,000 | 700m | 2 | Good |
| Sena 50R | ₹20,000–25,000 | 2km mesh | 24 | Excellent |
| Cardo Packtalk Bold JBL | ₹30,000–38,000 | 1.6km mesh | 15 | Excellent (JBL) |
Motorcycle Helmets — From Budget to ₹1,00,000+
Safety Ratings — What You Must Know Before Buying
Before price. Before brand. Before looks. Understand safety certification.
Every helmet sold must meet DOT (Department of Transportation) FMVSS 218 standards — this is the baseline. ECE 22.06 is the European standard and is generally considered more rigorous than DOT because it tests at multiple impact speeds and angles. Helmets with both DOT and ECE certifications offer a higher level of tested protection.
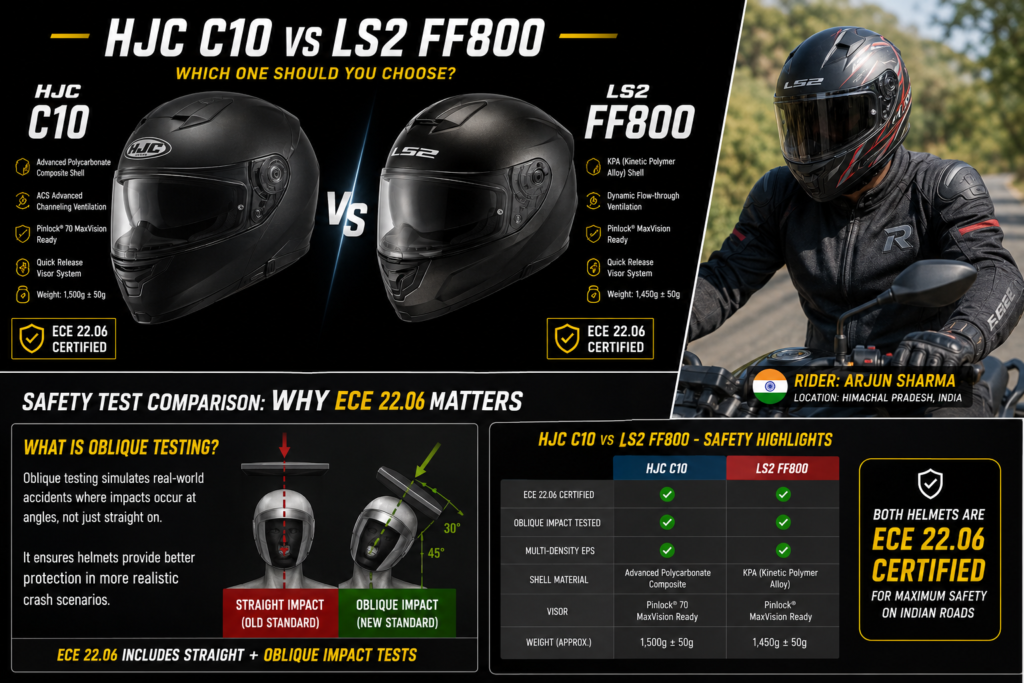
ECE 22.06 is the current European motorcycle helmet safety standard. It adds oblique impact testing — simulating real-world crashes at an angle — that the older ECE 22.05 standard didn’t have. Any helmet with ECE 22.06 certification has passed significantly stricter safety tests — it’s the minimum standard we recommend for all riders in 2026.
The SHARP rating (UK independent testing): The SHARP (Safety Helmet Assessment and Rating Programme) tests helmets independently and rates them 1–5 stars. A 5-star SHARP rating is the highest independent safety endorsement available.
Helmets with 5-star SHARP rating 2026: Arai Signet-X: 5/5 SHARP | Shoei RF-SR: 5/5 SHARP | HJC C70: 5/5 SHARP | AGV Pista GP-R: 5/5 SHARP | Shark Race-R Pro: 5/5 SHARP
Which brand is safest in 2026? Based on independent testing, Arai leads the overall brand safety ranking for 2026, followed closely by Shoei.
Helmet Types — Which One for Moto Vlogging?
Full-Face Helmet: Maximum protection — covers chin and jaw (most crashes involve chin/jaw impact). Best for moto vlogging — chin mount works on a full-face helmet, not on open-face.
Modular/Flip-Front Helmet: Full-face helmet where the chin bar flips up. Convenient for talking at stops, eating at fuel stops, communication with others. Slightly heavier than full-face.
Adventure/Dual-Sport Helmet: Full-face with a peak/visor for off-road section visibility. Best for Himalayan and mountain rides. Can use with or without the peak.
Open-Face/3/4 Helmet: Covers top and back of head, no chin protection. Not recommended for high-speed riding. Good for city riding and slow-speed content filming.
Half Helmet: Covers only the top of the head. Minimum safety. Not recommended for anything above 40kmph.
Helmet Guide — Budget to Premium (India 2026 Prices)
BUDGET RANGE (₹3,000–8,000)
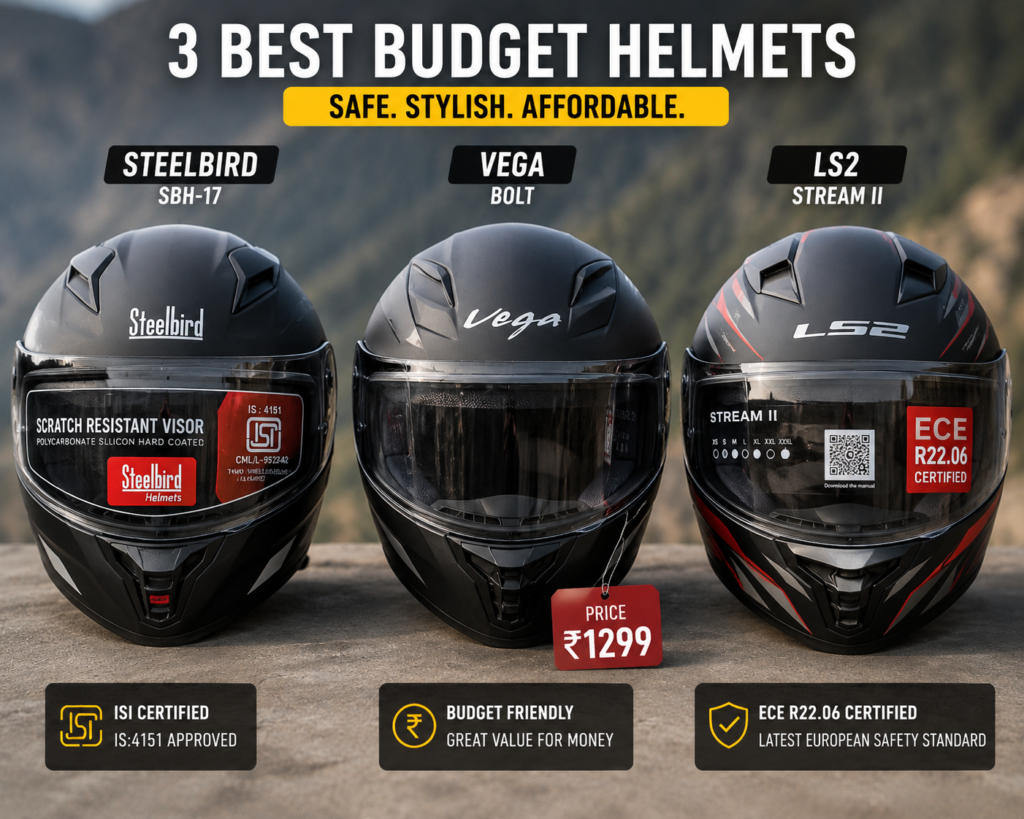
Steelbird SBH-11 Hunk (₹3,500–4,500)
- ISI certified (Indian standard)
- ABS shell, full-face, lightweight
- Good ventilation for the price
- For: City riding, beginners
- Not for: Highway touring at speed
Vega Off Road (₹4,000–6,000)
- ISI + DOT certified
- Dual visor (clear + sun)
- Comfortable for long wear
- Good value entry point
- For: Daily commute, weekend city rides
LS2 FF320 Stream Evo (₹7,000–10,000) LS2 consistently ranks in the top 5 helmet brands worldwide for value-for-money. They offer carbon fibre models at prices far below comparable AGV or HJC carbon helmets.
- ECE 22.05 certified
- Injected thermoplastic shell
- Quick release visor system
- Drop-down sun visor
- For: Budget highway touring, moto vlogging beginners
MID-RANGE (₹10,000–30,000)
SMK Helmets Stellar (₹9,000–14,000)
- ECE 22.05 certified
- ABS multi-layer shell
- Aerofoil ventilation system
- Good anti-scratch visor
- For: Regular highway touring, moto vlogging
KYT NX Race (₹12,000–20,000)
- ECE 22.05 certified, MotoGP-inspired design
- Fiberglass shell — lighter than polycarbonate
- Aerodynamic profile reduces neck fatigue
- For: Sport riding, aggressive touring
HJC C10 (₹8,000–12,000) The HJC C10 is a groundbreaking option in the budget category. Its most compelling achievement is being the first helmet to achieve ECE 22.06 certification while being available for under $100. This brings modern, enhanced safety protocols to a price point previously dominated by older standards.
- The best value safety helmet in 2026 — ECE 22.06 at a budget price
- For India: ₹10,000–14,000 depending on import availability
- For: Budget-conscious riders who refuse to compromise on safety certification
LS2 FF800 Storm II (₹14,000–22,000)
- ECE 22.06 certified
- Kinetic Polymer Alloy (KPA) shell
- Excellent ventilation for Indian summers
- For: Year-round touring in India’s climate
PREMIUM RANGE (₹30,000–60,000)
AGV K6 S (₹40,000–55,000) AGV K6 S — possibly the most comfortable helmet in its class. Carbon-aramid-fiberglass shell, four shell sizes for accurate fit, weighs just 2.9 pounds. ECE and DOT certified. Around $450 to $500.
- One of the lightest premium helmets — 1,300g — reduces neck fatigue on long rides
- MotoGP-derived shell technology
- Excellent ventilation but louder than Shoei at high speed
- For: Long-distance touring, moto vlogging highway content
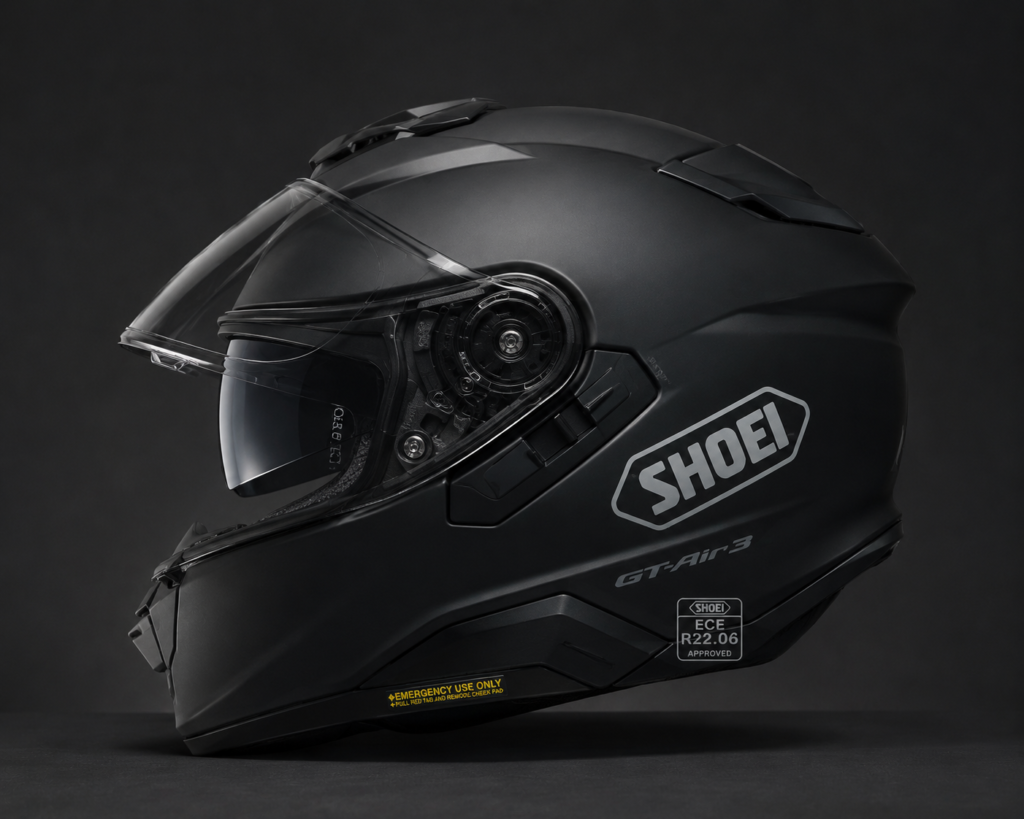
Shoei GT-Air 3 (₹55,000–75,000) For most road riders, the Shoei GT-Air 3 is the best overall motorcycle helmet of 2026. It combines premium build quality, ECE 22.06 approval, touring comfort, a practical sun visor, strong aerodynamics and excellent all-round usability.
- ECE 22.06 certified
- Integrated sun visor — flips down without stopping
- Shoei’s quietest road helmet to date
- SENA SRL3 Bluetooth communication system compatible (integrated — no external unit visible)
- For: Serious touring, premium moto vlogging content
Shoei RF-1400 (₹50,000–65,000) Shoei RF-1400 — the benchmark for mid-premium full-face helmets. Lightweight at 3.2 pounds, excellent ventilation, and a very quiet ride up to highway speeds. ECE and DOT certified.
ULTRA-PREMIUM (₹60,000–1,00,000+)
Arai Quantic (₹75,000–95,000) The Arai Quantic combines top-tier safety as an ECE 22.06 pioneer with exceptional comfort and ventilation, making it a premier all-rounder for sport-touring and everyday riding. Arai tends to focus on maximum safety, featuring thicker, rounder shells designed to deflect and disperse impact forces. This approach helps reduce the risk of rotational injuries in a crash.
- Hand-built in Japan — each shell hand-finished
- The rounder Arai shell shape is specifically designed to glance off surfaces rather than snag, reducing rotational force in crashes
- For: Riders who prioritise absolute safety above everything else
Shoei X-15 (₹85,000–1,00,000+) The X-15 offers an incredibly sophisticated AIM+ shell design which allows for strength and elasticity, improved ventilation, improved field of view, and an adjustable liner to allow the rider to customize how the helmet sits on one’s head. It carries SNELL, ECE, and DOT safety ratings.
- The helmet worn by Marc Márquez in MotoGP
- SNELL + ECE + DOT certified — the only triple certification in this guide
- For: Track days, serious sport touring, those who want the absolute pinnacle
Schuberth C5 (₹90,000–1,10,000) — Best Modular Option The Schuberth C5 is the modular option for supreme quietness — a premium flip-front helmet for touring and everyday riding at the highest level.
- Wind tunnel designed — the quietest helmet available
- Integrated SRC system (Schuberth’s own intercom)
- For: Long-distance touring riders who use their helmet 8+ hours a day
Helmet Comparison Summary Table
| Helmet | Price (India) | Safety Rating | Shell | Best For |
|---|---|---|---|---|
| Steelbird SBH-11 | ₹3,500–4,500 | ISI | ABS | Budget city |
| Vega Off Road | ₹4,000–6,000 | ISI + DOT | ABS | Budget city/town |
| LS2 FF320 | ₹7,000–10,000 | ECE 22.05 | Thermoplastic | Budget highway |
| HJC C10 | ₹10,000–14,000 | ECE 22.06 | Polycarbonate | Best budget safety |
| SMK Stellar | ₹9,000–14,000 | ECE 22.05 | ABS | Mid touring |
| LS2 FF800 Storm II | ₹14,000–22,000 | ECE 22.06 | KPA | Mid touring |
| AGV K6 S | ₹40,000–55,000 | ECE + DOT | Carbon-fibre | Premium light |
| Shoei GT-Air 3 | ₹55,000–75,000 | ECE 22.06 | AIM+ | Best overall touring |
| Arai Quantic | ₹75,000–95,000 | ECE 22.06 | Hand-built | Max safety |
| Shoei X-15 | ₹85,000–1,00,000+ | SNELL+ECE+DOT | AIM+ | Race/track/sport |
Safety Gear — The Complete Rider’s Kit
The Non-Negotiable List
Rule: ATGATT — All The Gear, All The Time. Not “just a short ride.” Not “it’s too hot today.” Every ride, every time.
Riding Jackets
What to look for: CE Level 2 armour at shoulders and elbows minimum. CE Level 1 or 2 back protector (many jackets have a pocket for a back protector — buy one separately if not included). 600D abrasion-resistant outer shell minimum for highway riding.
Budget Range (₹3,000–8,000):
Rynox Air GT 3 (₹5,500–7,500)
- Level 1 CE certified armour at shoulders, elbows
- Mesh construction for Indian summer riding
- Good ventilation, affordable, widely available
Solace SS-519 (₹4,000–6,000)
- CE Level 1 armour
- Waterproof with removable liner
- Best budget winter touring jacket
Mid Range (₹10,000–25,000):
Royal Enfield Highway Jacket (₹12,000–18,000)
- CE Level 2 shoulder and elbow armour
- Back protector pocket
- Good build quality, brand service network
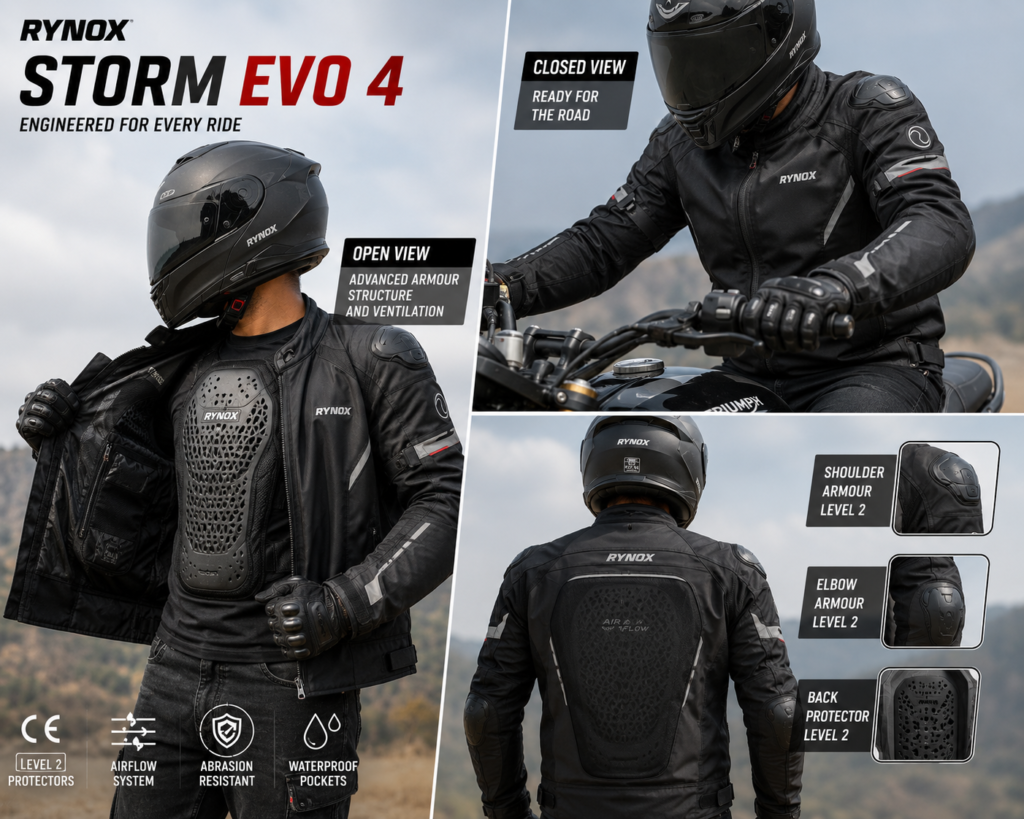
Rynox Storm Evo 4 (₹18,000–25,000)
- CE Level 2 certified armour
- 3-season versatility (removable liner)
- Waterproof + ventilation combination
- Back protector included (Level 2)
- Best mid-range value in India 2026
Premium (₹35,000–80,000+):
Alpinestars T-GP R V4 Air (₹45,000–65,000)
- CE Level 2 certified Bio Armor
- Bionic Nucleon KR back protector compatible
- Mesh construction for maximum airflow
- MotoGP-derived construction quality
Dainese Air Frame D1 (₹55,000–75,000)
- Level 2 CE certified Pro-Shape 2.0 armour
- Perforated leather panels
- Composite fibre reinforcement
Riding Pants
Why riding pants matter: Road rash on legs in a slide is as serious as arms. Regular jeans provide approximately 0.6 seconds of protection against road abrasion. CE-rated riding pants provide 4+ seconds.
Budget (₹3,000–8,000):
Rynox Tornado Pro 3 (₹4,500–6,500)
- CE Level 1 hip and knee armour
- Reinforced panels at key impact zones
- Looks like regular cargo pants — discreet
Mid Range (₹10,000–22,000):
Rynox Latitude (₹14,000–18,000)
- CE Level 2 hip and knee armour
- 600D Cordura outer panels
- Compatible with Rynox jackets for full suit connection
Premium (₹25,000–60,000+):
Alpinestars Andes V3 Drystar (₹38,000–52,000)
- CE Level 2 knee and hip armour
- Drystar waterproof membrane
- Connects to Alpinestars jackets via zip
Riding Boots
Minimum requirement: Ankle protection, oil-resistant sole, heel counter. Sneakers are not riding boots.
Budget (₹2,500–5,000):
Rynox Bastion Boots (₹3,500–5,000)
- Ankle and shin protection
- CE Level 1 certified
- Comfortable for all-day wear
- Best entry-level riding boot in India
Mid Range (₹8,000–20,000):
Alpinestars Faster-3 (₹12,000–16,000)
- Level 2 CE certified (IQ ankle protection)
- Low-profile sport design
- Comfortable for walking at stops
Premium (₹25,000–60,000+):
Alpinestars SMX-6 V3 (₹35,000–45,000)
- Level 2 CE ankle protection
- Microfiber/mesh construction
- Pre-curved for riding ergonomics
Riding Gloves
Minimum: Knuckle protection, palm slider (abrasion resistance), wrist closure.
Budget (₹700–2,000): Cramster Hug Gloves (₹1,200–1,800) — TPU knuckle protection, good grip, adequate protection for city riding
Mid Range (₹3,000–8,000): Rynox Air GT 3 Gloves (₹3,500–5,500) — CE Level 1 knuckle protection, mesh for summer ventilation
Premium (₹10,000–25,000+): Alpinestars SP-8 V3 (₹14,000–18,000) — CE Level 2 certified, kangaroo leather palm, scaphoid protector
Back Protector (Standalone)
If your jacket only has Level 1 back protection (or none), invest in a standalone Level 2 CE back protector.
Rynox Shield Pro L2 (₹1,500–2,500): Fits in most jacket back pockets, CE Level 2 certified — the single best value safety upgrade available
Complete Safety Gear Budget Summary
| Item | Budget | Mid-Range | Premium |
|---|---|---|---|
| Helmet | ₹3,500–10,000 | ₹14,000–35,000 | ₹55,000–1,00,000+ |
| Jacket | ₹4,000–8,000 | ₹12,000–25,000 | ₹40,000–80,000+ |
| Pants | ₹3,500–6,500 | ₹14,000–20,000 | ₹35,000–55,000+ |
| Boots | ₹3,000–5,000 | ₹10,000–18,000 | ₹30,000–50,000+ |
| Gloves | ₹1,200–2,000 | ₹3,500–6,000 | ₹12,000–20,000+ |
| Complete set total | ₹15,200–31,500 | ₹53,500–1,04,000 | ₹1,72,000–3,05,000+ |
Bike Lighting for Moto Vlogging
Why Lighting Matters for Both Safety and Content
Auxiliary lights on a bike serve two purposes for a moto vlogger: safety (being seen by other road users at dawn and dusk) and content quality (proper lighting makes on-bike footage look more professional and adds visual drama).
Auxiliary Driving Lights
Budget LED Auxiliary Lights (₹800–3,000 per pair): Generic LED spotlights available on Amazon/Flipkart. Variable quality. Check beam pattern — a good auxiliary light has a tight hot spot for distance and a flood component for peripheral illumination.
Recommended Budget: Osram LEDriving auxiliary lights (₹2,500–4,500 per pair) — better build quality, known brand, waterproof rating
Premium:
Denali DM LED Light Kit (₹15,000–25,000): The benchmark for motorcycle auxiliary lighting. Specifically designed for motorcycles, includes wiring harness, multiple mounting options, and CAN bus compatibility for modern bikes.
PIAA Powersport Series (₹12,000–20,000): Japanese quality, excellent beam pattern, long-life LEDs, widely used by touring riders.
Handlebar-Mounted LED Light Bars
LED light bars from 8-inch to 12-inch width, mounted on a handlebar crossbar bracket:
Budget: XANES or Auxbeam 10-inch LED bar: ₹2,000–4,000 — adequate for unmade forest roads and campsites
Premium: Rigid Industries D-Series: ₹18,000–28,000 per pair — the gold standard for off-road auxiliary lighting
Accent/Underglow Lighting for Video
For YouTube content — accent lighting on the bike makes night footage and evening parking shots significantly more cinematic.
RGB LED strip kits: ₹800–3,000 for a full bike kit, app-controlled, waterproof. Available on Amazon India. Adds visual drama to static shots.
Tail Light Upgrades
For moto vloggers doing solo rides on mountain roads, a sequential/bright LED tail light upgrade is both a safety feature and a visual element in chase-cam footage.
Motodynamic Sequential LED Tail Light (Universal): ₹4,000–8,000
The 3-Day Solo Moto Vlog Story
Day 1: The Road Opens at 5am
Route: Mumbai to Mahabaleshwar via NH-48 → Pune → Satara Distance: 285km Bike: Royal Enfield Himalayan 450 Cameras: DJI Osmo Action 6 (chin mount) + GoPro Hero 13 (chest mount) Audio: Sena 50R connected to Osmo Action 6 via 3.5mm
I recorded the pre-departure ritual first — gear check on camera, the SD cards going in, the Sena pairing confirmation tone in my ear. These 3–4 minutes of “getting ready” footage is gold for moto vlog intros. Viewers connect with the ritual.
The first hour out of Mumbai on NH-48 — the expressway before Pune — is fast and cinematic. I shot in 4K/60fps on the Osmo Action 6 with RockSteady on. At 100kmph, the footage was buttery smooth. The chest-mount GoPro ran simultaneously in HyperView/4K — the wide angle gave it that immersive “inside the ride” feel.
The recording tip that changed my channel: I talk to myself while riding. Out loud. To the camera. Not a monologue — just observations. “The fog is lifting, you can see the Sahyadri range now on the left.” “There are orange marigold trucks heading south — must be the wholesale flower market.” This commentary, captured through the Sena mic, becomes the narration track in editing. No voice-over needed.
After Pune, the Western Ghats begin. The road from Satara to Mahabaleshwar climbs 1,000m in 28km. I stopped four times on this section — not for rest, for shots. The DJI Osmo Pocket 4 came out at the viewpoint above Venna Lake. This is the B-roll that makes a travel vlog feel cinematic rather than just road footage.
Day 1 filming total: 47 minutes of usable 4K footage | 22 minutes chest mount | 15 minutes Pocket 4 scenic | 6 minutes of B-roll stills
Stay: Mahabaleshwar — Zostel Mahabaleshwar ₹1,200 for a private room
Day 2: The Early Morning Chase
Route: Mahabaleshwar → Koyna Dam → Chiplun Distance: 180km Start time: 5:45am — for the valley fog
The Koyna stretch on an early morning is one of the most cinematically beautiful roads in Maharashtra. Dense forest, valley fog, the sound of birds and the engine — this section I left the camera on its standard settings and the audio of the Sena just picked up my breathing and the engine note.
The “no commentary” rule: Some sections are better silent. The sounds of the ride — wind, engine, birds, rain starting — are content. Trust the audio.
The descent from the Ghats to the Konkan coast changes everything. The temperature rises 8 degrees in 30 minutes. The vegetation changes. The ocean appears. I stopped at a viewpoint 12km before Chiplun and the Insta360 X4 (which I’d been running on the top mount all day) captured the valley opening toward the sea in a 360 shot that I later reframed in Insta360 Studio as a dramatic slow pull-back.
Content creator note: The 360 camera gives you “mistakes” that become your best shots. This coastline reveal was not planned — it happened because the 360 camera was capturing everything.
Stay: Chiplun — local guesthouse ₹800
Day 3: The Return and the Rain
Route: Chiplun → Kolad (rafting detour) → Pune → Mumbai Distance: 310km
Rain started 40km south of Pune. The GoPro Hero 13 is waterproof — kept recording without concern. The Osmo Action 6’s 20m waterproofing meant it also kept going. The DJI Osmo Pocket 4 went into the jacket pocket (not waterproof).
Rain footage tip: Rain on a moto vlog is content. The droplets hitting the visor, the spray from trucks, the wet road reflections in the chest mount footage — this is some of the most viewed footage on any moto vlog channel. Don’t panic in rain. Keep recording.
Back in Mumbai by 4pm. Total footage across 3 days: 3.2 hours of riding footage, 45 minutes of scenic/B-roll. Edit time: approximately 6 hours to produce a 20-minute YouTube video and a 90-second Instagram Reel.
The edit structure I used:
- Intro hook (30 seconds) — best visual + best audio from the whole trip
- Day 1 condensed (6 minutes)
- Day 2 highlight (5 minutes)
- Day 3 highlight including rain (4 minutes)
- Final reflection/outro (5 minutes)
Total video length: 20 minutes — the sweet spot for moto vlog YouTube retention in 2026.
How to Film — Solo, With a Partner, and in a Group
Filming Solo
The challenge: You are rider, filmmaker, director, and subject simultaneously.
Solutions:
- Rely on your intercom for audio — the Sena commentary IS the narration. Talk naturally while riding.
- Pre-plan your B-roll stops — pick 4–5 locations on your route to stop specifically for scenic/portrait shots using the Osmo Pocket 4 or handlebar-mounted camera.
- Use the 360 camera liberally — it removes the need to aim. The Insta360 X4 captures everything and you choose angles later.
- Keep riding footage rolling — better to have 2 hours of footage and use 15 minutes than to stop recording and miss the moment.
Solo camera switch system:
- GoPro Hero 13 (chest) = always on, background running
- DJI Osmo Action 6 (chin) = primary, stop/start at key moments
- DJI Osmo Pocket 4 = out at stops only, commentary and scenic B-roll
Filming with a Partner
The best moto vlog dynamic is a two-rider pair — one bike with helmet cam, one bike ahead as the “hero bike” for chase shots.
Setup for two-rider filming:
- Rider 1 (lead): DJI Osmo Action 6 on chin, GoPro on chest
- Rider 2 (chase): DJI Osmo Action 6 on handlebar facing forward — shoots lead rider as the subject from behind
- Communication: Both on Sena 50R/Cardo — the intercom conversation BECOMES the audio track
The best shot in two-rider moto vlogging: Chase bike slightly right of centre, behind lead bike by 30m, camera angled to see lead rider with road curving ahead. This is the shot on every popular moto vlog thumbnail.
Filming in a Group (5+ Riders)
Sena Mesh setup for groups: All riders on Sena 50R or 50S — the group conversation is live as audio. Designate one rider as the “audio lead” whose Sena captures to their camera.
Camera assignments for group rides:
- Lead rider: chin mount forward-facing
- Tail rider (last in group): handlebar mount facing the whole group in front
- Middle rider: 360 camera for immersive group footage
Group ride filming tip: Walkie-talkie style check-ins at key moments — “Coming up on the pass in 2km, cameras on” — this cues everyone to activate their cameras simultaneously for the same moment.
Planning Your Moto Vlog Trip
Solo Ride Planning (The Checklist)
2–3 days before:
- Plan route on Google Maps, check road conditions on BRO/highway authority sites
- Download offline Maps for entire route
- Check weather forecast (Weather Underground for mountain areas — more accurate than standard apps)
- Book accommodation at start and end point; leave day 2 flexible
- Check bike: tyre pressure, engine oil, chain tension, all lights
- Format all SD cards, charge all batteries and power banks
- Test all camera mounts — ride around the block before the trip
Night before:
- Pack: cameras, mounts, batteries, power bank, rain cover, SD cards backup
- Charge Sena/Cardo intercom
- Prepare route brief — landmarks, fuel stops, turn-off points
Day of:
- Start recording before you leave — the departure is content
- First fuel fill with full tank — note the odometer
- Tell someone your route and ETA
Group Ride Planning
Communication brief (30 minutes before departure):
- All Sena/Cardo units paired and tested
- Ride sequence (who is lead, who is tail)
- Speed agreement for group — nobody rides faster than the slowest comfortable rider
- Hand signals: stop, slow, fuel, turn, hazard on road
- Emergency contact and hospital locations on shared group WhatsApp
Filming brief:
- Who has which camera position
- Pre-agreed “camera on” signals for key moments
- One designated person manages content coordination after the ride
Part 10: Long-Distance Riding Guide
Physical Preparation for Long Rides (500km+ Days)
Riding position and fatigue: Fatigue from incorrect posture is the primary cause of accidents after 6 hours of riding. Adjust mirrors and handlebar height before a long trip to find a natural, relaxed arm position.
Hydration: At 80kmph with a full-face helmet, you lose 500ml of water per hour through breathing and sweating at the visor. Drink water at every fuel stop — minimum 250ml. A hydration pack worn under the jacket is the best long-distance solution.
Breaks: Every 90–120 minutes maximum. Even 10 minutes off the bike, walking, stretching. Your concentration degrades after 90 minutes of unbroken riding.
Earplugs: Wind noise at 100kmph is approximately 90dB — above the level that causes hearing damage over time. Wear reusable foam or silicone earplugs under your helmet. Your helmet intercom still works through them.
Riding in rain: Slow down. Increase following distance to 4 seconds minimum. Turn off cruise control. Watch for painted road markings — they are extremely slippery when wet. Do not brake hard — progressive, both brakes together.
Moto Vlog Editing — Quick Guide
Software Recommendations 2026
Free:
- DaVinci Resolve (Mac/Windows/Linux): The best free video editor available. Used by professional filmmakers. Handles GoPro and DJI footage natively, colour grading tools that surpass most paid alternatives. Learning curve: 2–3 weeks to get comfortable.
- CapCut (Mobile): For Instagram Reels and quick edits on your phone immediately after a ride. Free, very capable for mobile editing.
Paid:
- Adobe Premiere Pro (₹1,799/month): Industry standard. Best for complex multi-camera edits.
- Final Cut Pro (₹30,000 one-time, Mac only): Best performance on Mac. Most popular with YouTube creators.
- Wondershare Filmora (₹3,999/year): Good middle ground — easier than Premiere, more features than CapCut.
Video Settings for YouTube 2026
YouTube nerfs your footage, especially 1080p. Recording in 1080p then upscaling to 2.7K tricks YouTube into thinking it is a real 2.7K video, so it gives the upload a better codec. Many creators now prefer 4K/60fps for smoother motion.
Recommended export settings for YouTube (DaVinci Resolve):
- Resolution: 3840×2160 (4K) or 2704×1520 (2.7K upscale)
- Frame rate: 60fps
- Codec: H.265 (better compression, same quality)
- Bitrate: 50,000–80,000 kbps for 4K
- Audio: AAC, 48kHz, 320kbps stereo
FAQ Section
Q: What is the best camera for moto vlogging in India in 2026?
A: The DJI Osmo Action 6 is the best action camera for moto vlogging in 2026 — class-leading low-light performance, 20m waterproofing, 4K/120fps, and the best stabilisation for road vibration. For those on a tighter budget, the GoPro Hero 13 Black is the best alternative with the largest mount and accessory ecosystem available.
Q: Which is the safest motorcycle helmet brand in 2026?
A: Based on independent safety testing, Arai leads the overall brand safety ranking for 2026, followed closely by Shoei. Both are Japanese manufacturers who hand-build their helmets. For Indian riders on a budget, the HJC C10 (₹10,000–14,000) is the first budget helmet to achieve ECE 22.06 certification — the most rigorous standard available.
Q: What is the difference between Sena and Cardo intercoms?
A: Both are excellent — the main differences are ecosystem and group size. Sena 50R (₹20,000–25,000) connects up to 24 riders via Mesh Intercom and has dual Bluetooth for simultaneous camera + phone connection. Cardo Packtalk Edgr (₹17,000–22,000) is slightly cheaper and its DMC mesh is considered slightly more stable for larger groups. For camera audio connectivity, Sena has a slight edge.
Q: How do I mount a camera on my motorcycle helmet?
A: The chin bar is the most popular mount for full-face helmets — use the curved adhesive mount (included with GoPro/DJI), clean the surface with an alcohol wipe, attach firmly, and allow 24 hours to cure before riding. Top mount and side mount are alternatives. Never drill into a helmet — it compromises the structural integrity.
Q: How much does a complete moto vlog setup cost in India 2026?
A: A beginner setup (used GoPro Hero 12 + Sena SMH5 + basic chest mount) runs ₹18,000–28,000. A solid mid-range setup (DJI Osmo Action 6 + GoPro Hero 13 + Sena 50R + multiple mounts) runs ₹80,000–1,00,000. A professional multi-camera setup with Insta360 X4 added runs ₹1,20,000–1,60,000. Safety gear is separate and equally important.
Q: What riding gear is required for moto vlogging long-distance trips?
A: The non-negotiable minimum: Full-face helmet (ECE 22.06 or ISI certified), CE-rated riding jacket with armour at shoulders, elbows and back, riding gloves with knuckle protection, and ankle-protective riding boots. Riding pants with hip and knee armour are strongly recommended for highway riding. Never ride a long trip in jeans and sneakers.
Q: How do I use Yoast SEO to rank a moto vlog article on WordPress?
A: Set your focus keyphrase, write an SEO title under 60 characters with the keyword early, write a meta description under 160 characters, include the keyword in the first paragraph, use it in at least one H2 heading, add alt text with keyword variations to all images, ensure all Yoast traffic lights are green, and enable FAQ Schema using the Yoast FAQ block. Submit to Google Search Console after publishing.
Conclusion — Hit Record and Ride
You don’t need a ₹1,50,000 camera setup to start a moto vlog channel. You need a camera, a mount, a Sena intercom, and the willingness to hit record and ride.
The best moto vlog you’ll ever make is not the one with the most cameras. It’s the one where you’re genuinely somewhere worth being, talking genuinely about what you’re seeing, and the equipment is good enough to capture it honestly.
Everything in this guide — the DJI Osmo Action 6, the Sena 50R, the Shoei GT-Air 3 — is what makes that experience better, cleaner, safer, and more watchable. None of it replaces the ride itself.
Format your SD card. Charge the Sena. Mount the camera. Plan the route.
Hit record. Go.